 Pin This
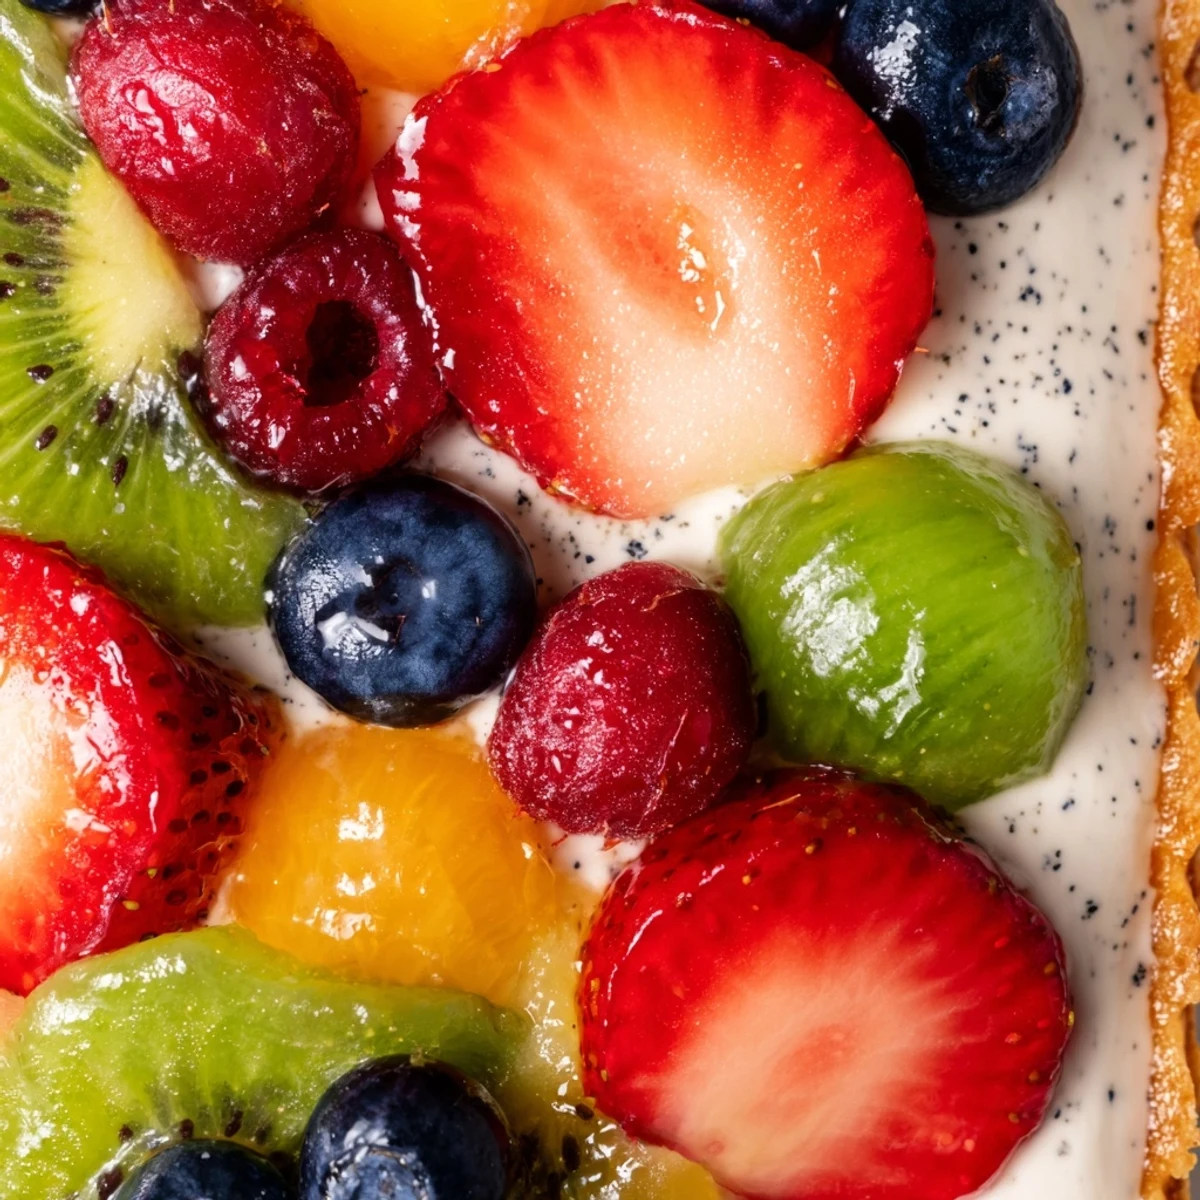
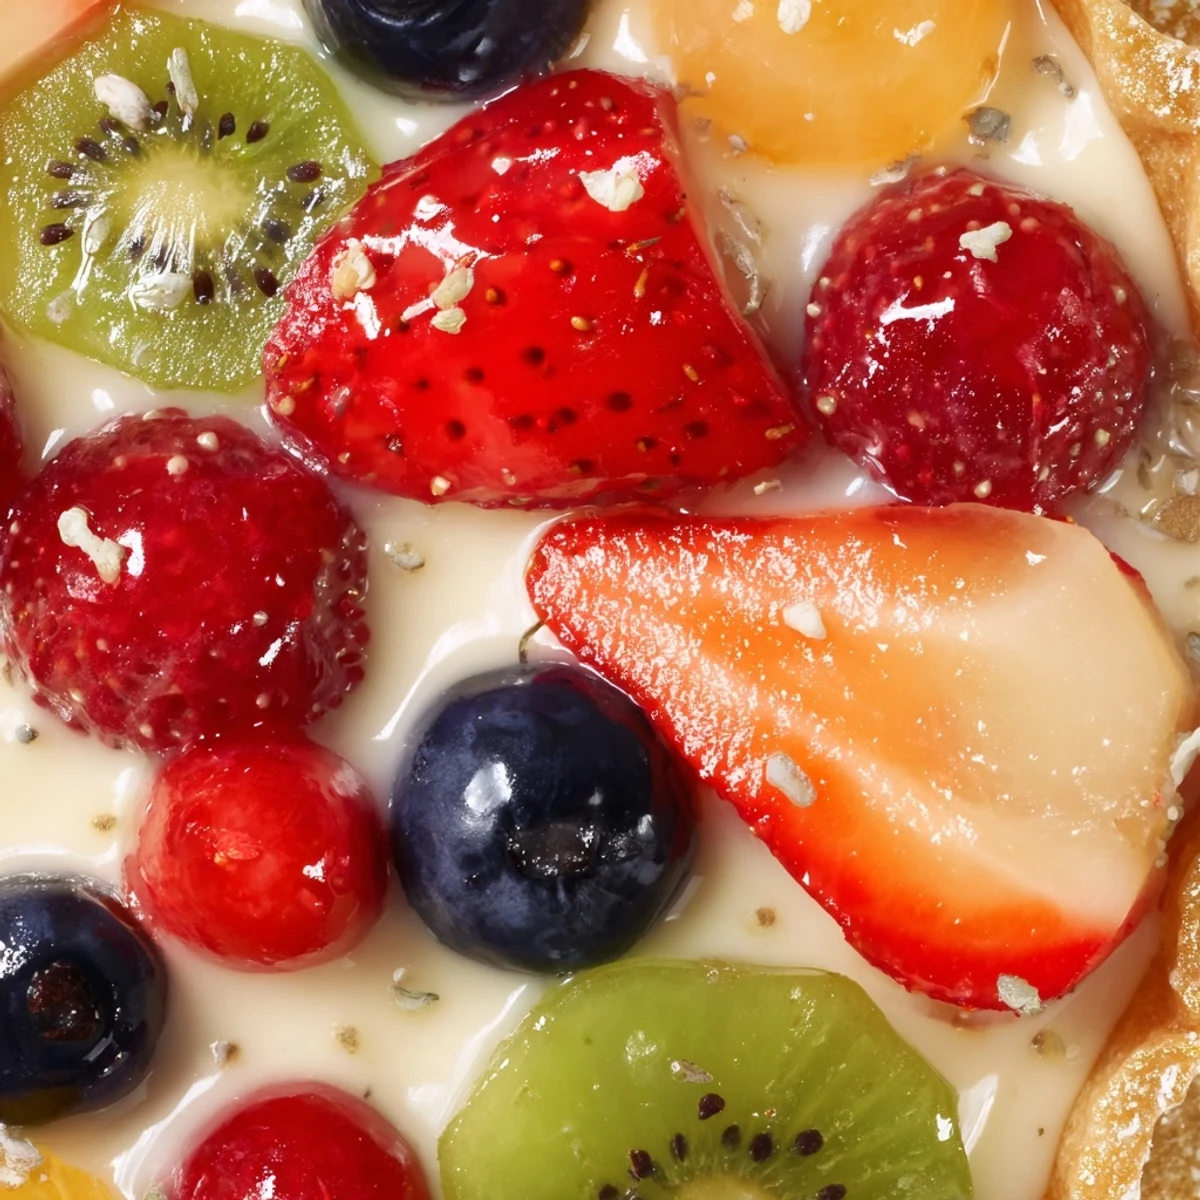
 This elegant Valentine dessert features a crisp, buttery crust filled with silky vanilla pastry cream and topped with a vibrant arrangement of fresh strawberries, raspberries, blueberries, and kiwi. The tart comes together with a glossy apricot glaze that enhances the natural beauty of the fruits. While the total time includes chilling periods, the hands-on preparation is straightforward and rewarding. Perfect for romantic occasions or special celebrations.
The kitchen smelled like butter and vanilla while rain tapped against the windowpanes, turning an ordinary Sunday afternoon into something dreamy. I'd been wanting to attempt a fruit tart for years, ever since that tiny bakery in Paris where I'd lingered over their window display, but something about the process always intimidated me. That day, with nowhere to be and a fridge full of berries, I finally went for it.
My sister walked in halfway through the crust-making process and immediately started sampling the berries meant for the topping. We ended up assembling the tart together, her arranging the fruit in this elaborate pattern while I tried not to hover, and the whole experience felt like something out of a cooking show but warmer and messier.
Ingredients
- 1 1/4 cups (160 g) all-purpose flour: The foundation of your crust, providing structure without becoming tough when handled properly
- 1/2 cup (115 g) unsalted butter, cold and cubed: Cold butter creates those flaky layers that make a tart crust exceptional
- 1/4 cup (50 g) granulated sugar: Just enough sweetness to balance the butter without making the crust cookie-like
- 1 large egg yolk: Adds richness and helps bind the dough together
- 1–2 tbsp cold water: Only add what you need for the dough to come together
- Pinch of salt: Essential for balancing sweetness and enhancing all flavors
- 2 cups (480 ml) whole milk: Creates the silkiest pastry cream imaginable
- 1/2 cup (100 g) granulated sugar: Sweetens the cream without overwhelming the vanilla
- 3 large egg yolks: These provide the thickening power that makes pastry cream so luscious
- 1/4 cup (30 g) cornstarch: The secret to a stable cream that holds its shape beautifully
- 1 tbsp unsalted butter: Adds an extra layer of richness to the finished cream
- 1 tsp pure vanilla extract: Don't skimp here—quality vanilla makes all the difference
- 1 cup (150 g) strawberries, hulled and sliced: Classic, romantic, and always stunning
- 1/2 cup (75 g) raspberries: Add gorgeous color and a tart contrast to sweet pastry cream
- 1/2 cup (75 g) blueberries: Provide beautiful blue-purple pops throughout your arrangement
- 1 kiwi, peeled and sliced: Adds unexpected color and a fresh tangy note
- 1/4 cup (60 ml) apricot jam: Warmed and brushed over fruit gives that professional bakery shine
- 1 tbsp water: Thins the jam just enough for easy brushing
Instructions
- Mix your dry ingredients:
- Pulse flour, sugar, and salt in a food processor until well combined, about 5 quick pulses
- Cut in the butter:
- Add cold cubed butter and pulse until the mixture looks like coarse crumbs with some pea-sized pieces remaining
- Bring dough together:
- Add egg yolk and 1 tablespoon water, pulsing until dough starts clumping but add more water only if it's too dry to form a ball
- Chill the dough:
- Shape into a disc, wrap tightly in plastic, and refrigerate at least 30 minutes or up to 2 days
- Roll and shape:
- Roll dough on a floured surface to about 1/8 inch thickness, then carefully drape over your tart pan and press into the edges
- Blind bake:
- Line the crust with parchment, fill with pie weights or dried beans, and bake at 375°F for 15 minutes before removing weights and baking 8–10 minutes more until golden
- Warm the milk:
- Heat milk in a medium saucepan until tiny bubbles form around the edges but don't let it come to a full boil
- Whisk the yolks:
- In a heatproof bowl, whisk egg yolks, sugar, and cornstarch until the mixture is pale and slightly thickened
- Temper the eggs:
- Slowly pour about one-third of the hot milk into the egg mixture while whisking constantly to prevent scrambling
- Thicken the cream:
- Pour everything back into the saucepan and cook over medium heat, whisking continuously until large bubbles form and the cream thickens noticeably
- Finish the cream:
- Remove from heat and stir in butter and vanilla until melted and fully incorporated
- Cool completely:
- Press plastic wrap directly onto the surface of the cream to prevent a skin from forming and refrigerate until cold
- Fill the tart:
- Spread the chilled pastry cream evenly into the cooled tart shell using an offset spatula
- Arrange the fruit:
- Start from the center and work outward in concentric circles or any pattern that makes your heart happy
- Add the glossy finish:
- Warm apricot jam with water until melted, strain out any chunks, and gently brush over the fruit for that professional shine
- Final chill:
- Refrigerate the assembled tart for at least 30 minutes to let everything set
 Pin This
 That first tart, with its imperfect but enthusiastic fruit arrangement, disappeared faster than I expected. Watching friends' eyes light up when they saw the glossy jewel-toned surface, then their quiet appreciation after that first bite of crisp crust and silky cream—it made every step worth it.
Making It Ahead
The tart crust can be made up to two days ahead and kept wrapped in the refrigerator. The pastry cream also benefits from being made a day in advance, which actually improves its flavor and texture. Only assemble the tart with fruit the day you plan to serve it, as the fruit can start to release juices after sitting too long.
Fruit Selection Secrets
Choose fruits that hold their shape well and won't brown quickly. I've learned the hard way that delicate fruits like fresh figs, while gorgeous, can turn mushy within hours. Stick to sturdier berries, sliced stone fruits in season, or even segmented citrus for a stunning winter variation.
Serving Suggestions
This tart tastes best when served slightly chilled but not refrigerator-cold, about 15–20 minutes after taking it out. A light dusting of powdered sugar right before serving adds an ethereal finish that photographs beautifully.
- Cut slices with a sharp knife dipped in hot water for clean edges
- Pair with a glass of sparkling wine or dessert wine for an elegant finish
- Leftovers, if you somehow have them, keep surprisingly well for a day in the refrigerator
 Pin This
 There's something deeply satisfying about creating something so beautiful and delicious from scratch. Hope this tart becomes part of your own kitchen story.
Questions & Answers
- → How far in advance can I make this tart?
-
You can prepare the tart crust and pastry cream up to 2 days ahead. Store them separately in the refrigerator. Assemble with fresh fruit within 4-6 hours of serving for the best texture and appearance.
- → What other fruits work well for this tart?
-
Consider using fresh mango slices, blackberries, sliced peaches, or pomegranate seeds. Choose fruits that hold their shape well and complement each other visually with vibrant colors.
- → Can I make the pastry cream dairy-free?
-
Yes, substitute whole milk with coconut milk or almond milk. Use a plant-based butter alternative, though the texture may vary slightly. The vanilla flavor remains prominent.
- → How do I prevent the crust from getting soggy?
-
Fully bake the crust until golden brown and let it cool completely before adding the pastry cream. You can also brush the cooled crust with a thin layer of melted white chocolate as a moisture barrier.
- → What's the purpose of the apricot jam glaze?
-
The warmed apricot jam creates a beautiful glossy finish while sealing the fruit to prevent drying out. It also adds a subtle sweetness that enhances the natural flavors of the fresh fruits.
- → Can I freeze the assembled tart?
-
Freezing isn't recommended as the fruit texture becomes compromised and the pastry cream may separate. However, the baked crust and cooled pastry cream freeze well separately for up to 1 month.
