 Pin This
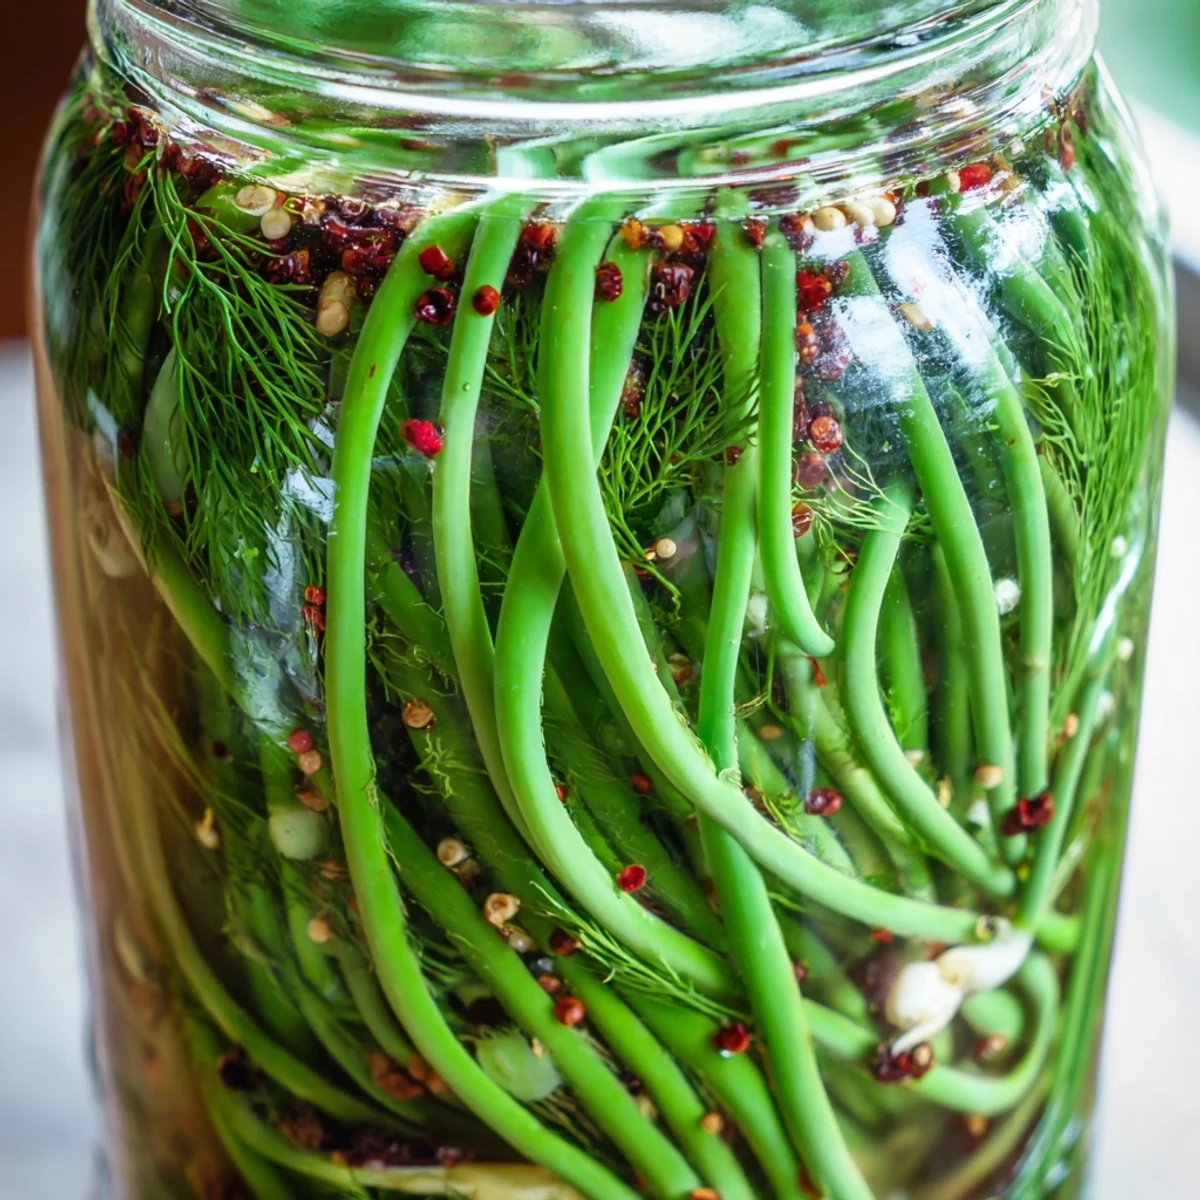
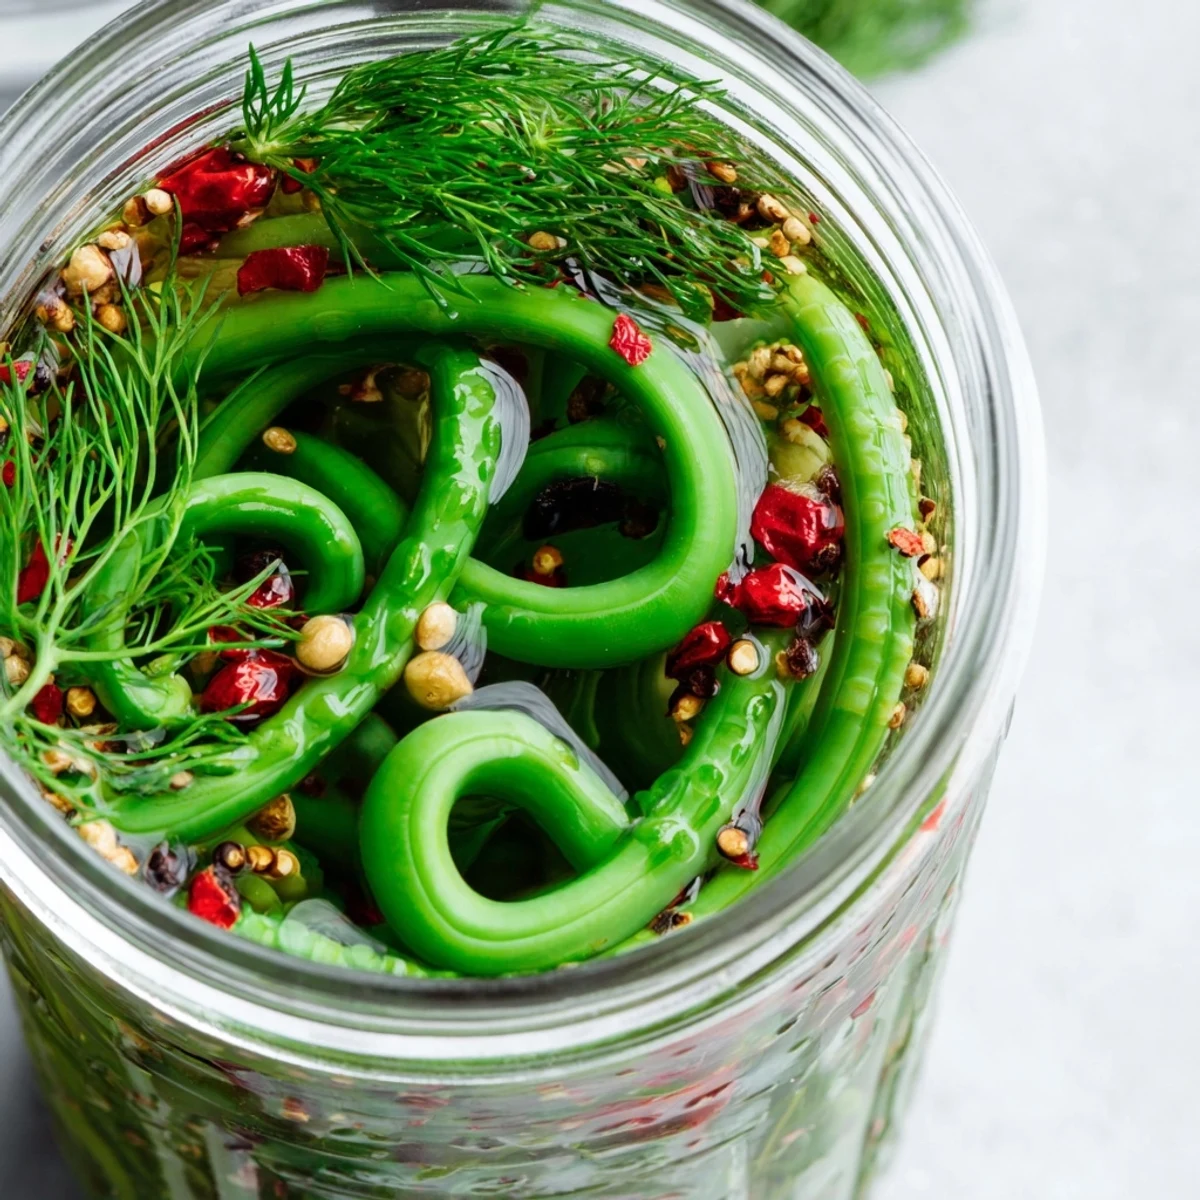
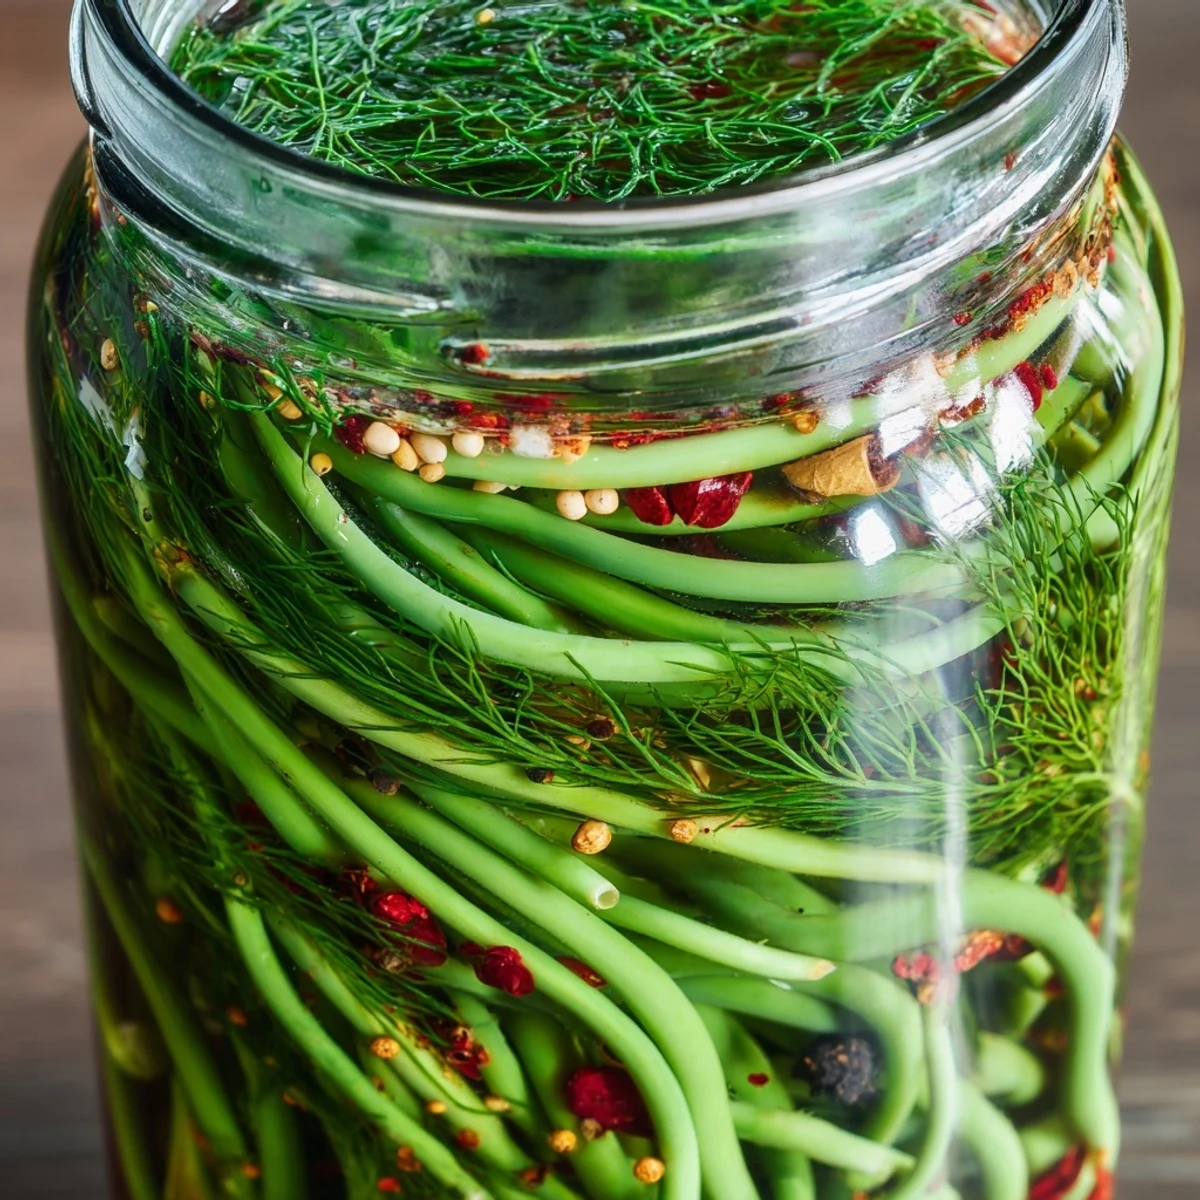
 Create vibrant, tangy garlic scapes with satisfying crunch and a kick of spicy heat. These pickled scapes develop complex flavors through a simple vinegar brine infused with peppercorns, mustard seeds, coriander, and dried chilies. The process transforms fresh garlic scapes into a versatile condiment that balances brightness with warmth, perfect for elevating charcuterie boards, sandwiches, or enjoying straight from the jar.
The first time I saw garlic scapes curling like green fireworks at the farmers market, I had no idea what to do with them. The farmer told me they taste like mild garlic with the crunch of a green bean, and honestly, that's all I needed to hear. I bought two massive bunches and proceeded to put them in everything. But it wasn't until I tried pickling them that they became something I actually craved all year round.
I made these for a summer potluck last year, mostly because I was running late and needed something that looked impressive but required zero oven time. Within an hour, three different people had asked for the recipe, and someone actually ate half a jar with nothing but a fork. That's when I knew these weren't just condiment material, they were the main event.
Ingredients
- Garlic Scapes: Look for firm, bright green curls without any yellowing or limp spots, and trim the woody ends before packing them in the jars.
- Distilled White Vinegar: This provides the clean, sharp acidity needed to cut through the garlic's pungent sweetness.
- Granulated Sugar: Just enough to balance the vinegar's harshness without making things taste sweet.
- Kosher Salt: The coarse texture dissolves evenly in the brine and enhances all the other flavors.
- Black Peppercorns: These add a gentle heat that builds in the background.
- Mustard Seeds: They bring a subtle earthiness that rounds out the sharper notes.
- Coriander Seeds: Citrusy and floral, they give the brine a lift you can't quite put your finger on.
- Red Pepper Flakes: Adjust these based on your heat tolerance, but even a small amount makes a difference.
- Dried Chilies: Whole chilies infuse gentle heat without overpowering the delicate garlic flavor.
- Bay Leaves: These add a subtle herbal depth that makes everything taste more composed.
- Fresh Dill: Completely optional, but if you love dill pickles, you'll want to add this.
Instructions
- Sterilize your jars:
- Wash everything thoroughly with hot, soapy water, then either boil the jars and lids for 10 minutes or run them through a hot dishwasher cycle and keep them warm until you're ready to fill them.
- Prep the scapes:
- Trim off the tough bottom ends and cut the scapes into lengths that fit your jars, curling them gently if needed to nestle everything in tight.
- Start packing:
- Divide the scapes, dill sprigs if you're using them, and dried chilies evenly between your two sterilized jars.
- Add the spices:
- Split the peppercorns, mustard seeds, coriander seeds, red pepper flakes, and bay leaves between the jars, tucking them into any gaps between the scapes.
- Make the brine:
- Combine the vinegar, water, sugar, and salt in a saucepan and bring it to a boil, stirring until everything has completely dissolved.
- Fill the jars:
- Carefully pour the hot brine over the scapes, making sure they're completely submerged, and leave about half an inch of headspace at the top.
- Seal and cool:
- Screw on the lids, let the jars cool to room temperature on the counter, then tuck them into the refrigerator.
- Wait it out:
- Let them pickle for at least 48 hours before opening, though they get even better after a full week of developing flavor.
 Pin This
 Now I keep at least two jars in the fridge all summer long. My partner has been known to eat them straight from the jar while standing in front of the open refrigerator at midnight, which I consider a ringing endorsement.
Customizing the Heat Level
After making these a dozen times, I've learned that heat preferences vary wildly in my household. Some weeks I double the red pepper flakes and add extra chilies, other times I skip the heat entirely for a gentler, more approachable pickle that even my garlic-averse friends will try. The beauty is you can adjust the spice in each jar separately, so everyone gets what they want.
Beyond the Jar
These pickles earn their keep far beyond snacking. I chop them into grain salads for instant brightness, tuck them into burger toppings for something unexpected, and they're absolutely brilliant minced into softened butter for corn on the cob. The brine itself is liquid gold, don't pour it down the drain. Use it to vinaigrette roasted vegetables or splash a spoonful into potato salad for instant depth.
Making Them Your Way
Once you get comfortable with this recipe, it's incredibly adaptable to whatever's in season or what you have on hand. The technique works beautifully with other vegetables too. Try throwing in carrot sticks, radish slices, or even green beans to fill any empty space in your jars. Some of my favorite batches have been total improvisations based on what needed using up in the crisper drawer.
- Slice the scapes into coins if you prefer smaller, bite-sized pieces that pack more evenly into the jar.
- Add a smashed garlic clove or two to each jar for an extra layer of garlic intensity.
- Swap the dried chilies for fresh jalapeño slices if that's what you have around.
 Pin This
 There's something deeply satisfying about opening a jar of these you made weeks ago, that hit of vinegar and spice hitting your nose before you even take a bite. Happy pickling.
Questions & Answers
- → What do garlic scapes taste like?
-
Garlic scapes offer a milder, fresher garlic flavor compared to cloves with a delightful crunch similar to asparagus or green beans. When pickled, they develop tangy notes that complement their natural savory profile.
- → How long do these pickled scapes last?
-
When properly refrigerated, these pickled garlic scapes maintain quality for up to one month. The flavors continue developing and intensify over time, reaching peak complexity after about one week of pickling.
- → Can I adjust the spice level?
-
Absolutely. Increase red pepper flakes or add extra dried chilies for more heat. For a milder version, reduce these ingredients or omit the dried chilies entirely while keeping the aromatic spices.
- → What's the best way to serve pickled garlic scapes?
-
These scapes shine on charcuterie boards alongside cheeses and cured meats. They also add crunch to sandwiches, brightness to salads, or serve as a tangy snack straight from the jar. Try them alongside grilled meats for a flavor contrast.
- → Can I use different vinegar types?
-
While distilled white vinegar provides clean tanginess, you can experiment with apple cider vinegar for fruitier notes or rice vinegar for milder acidity. Keep the 1:1 ratio with water for proper preservation.
