 Pin This
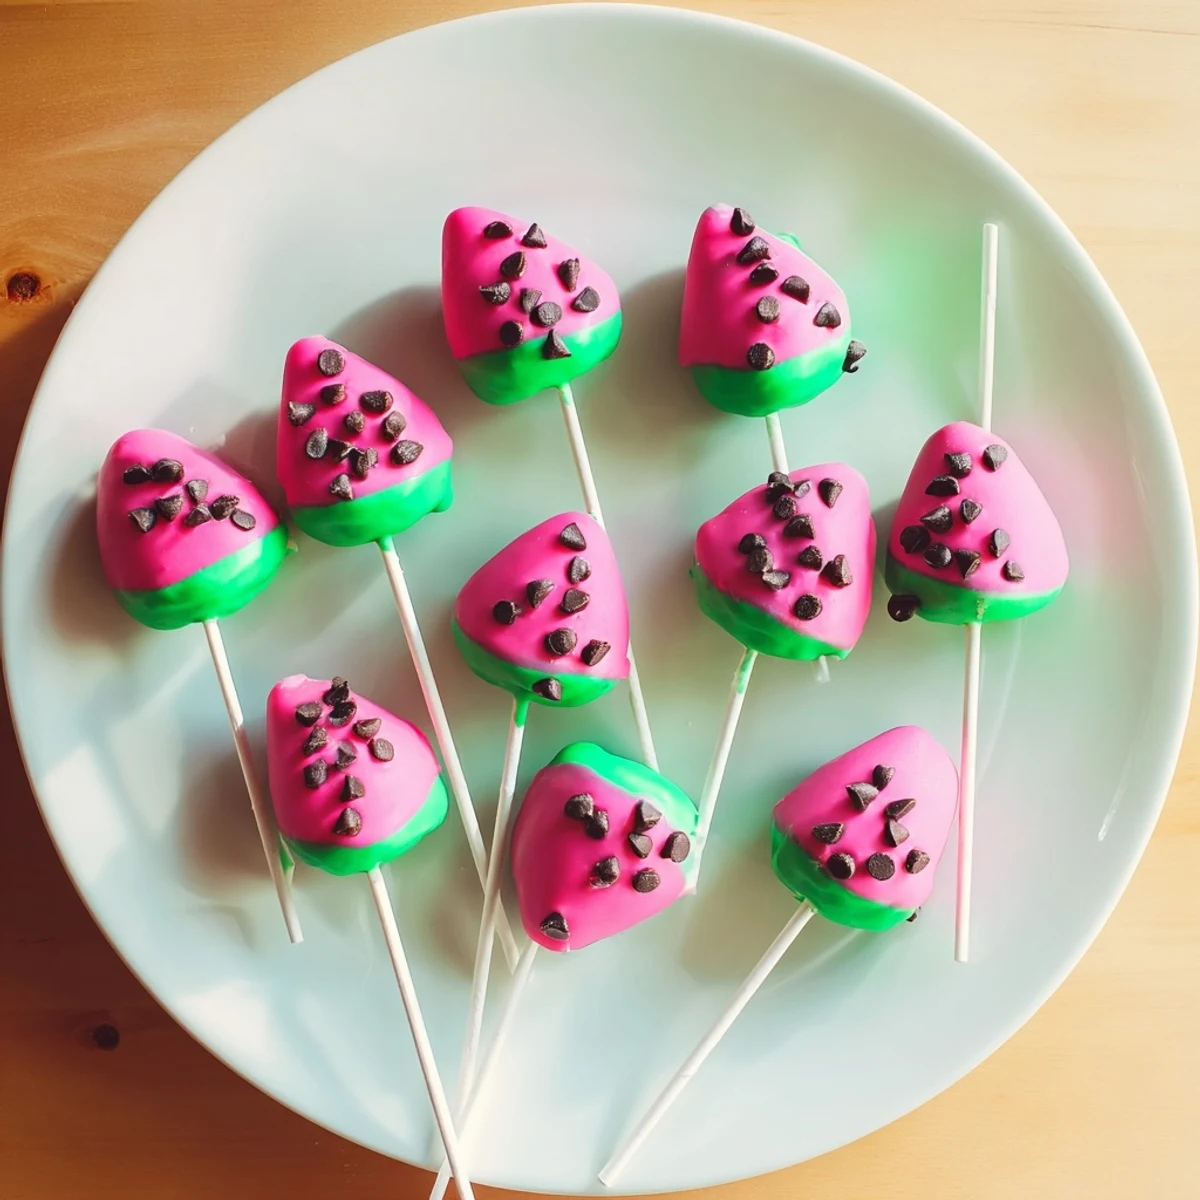
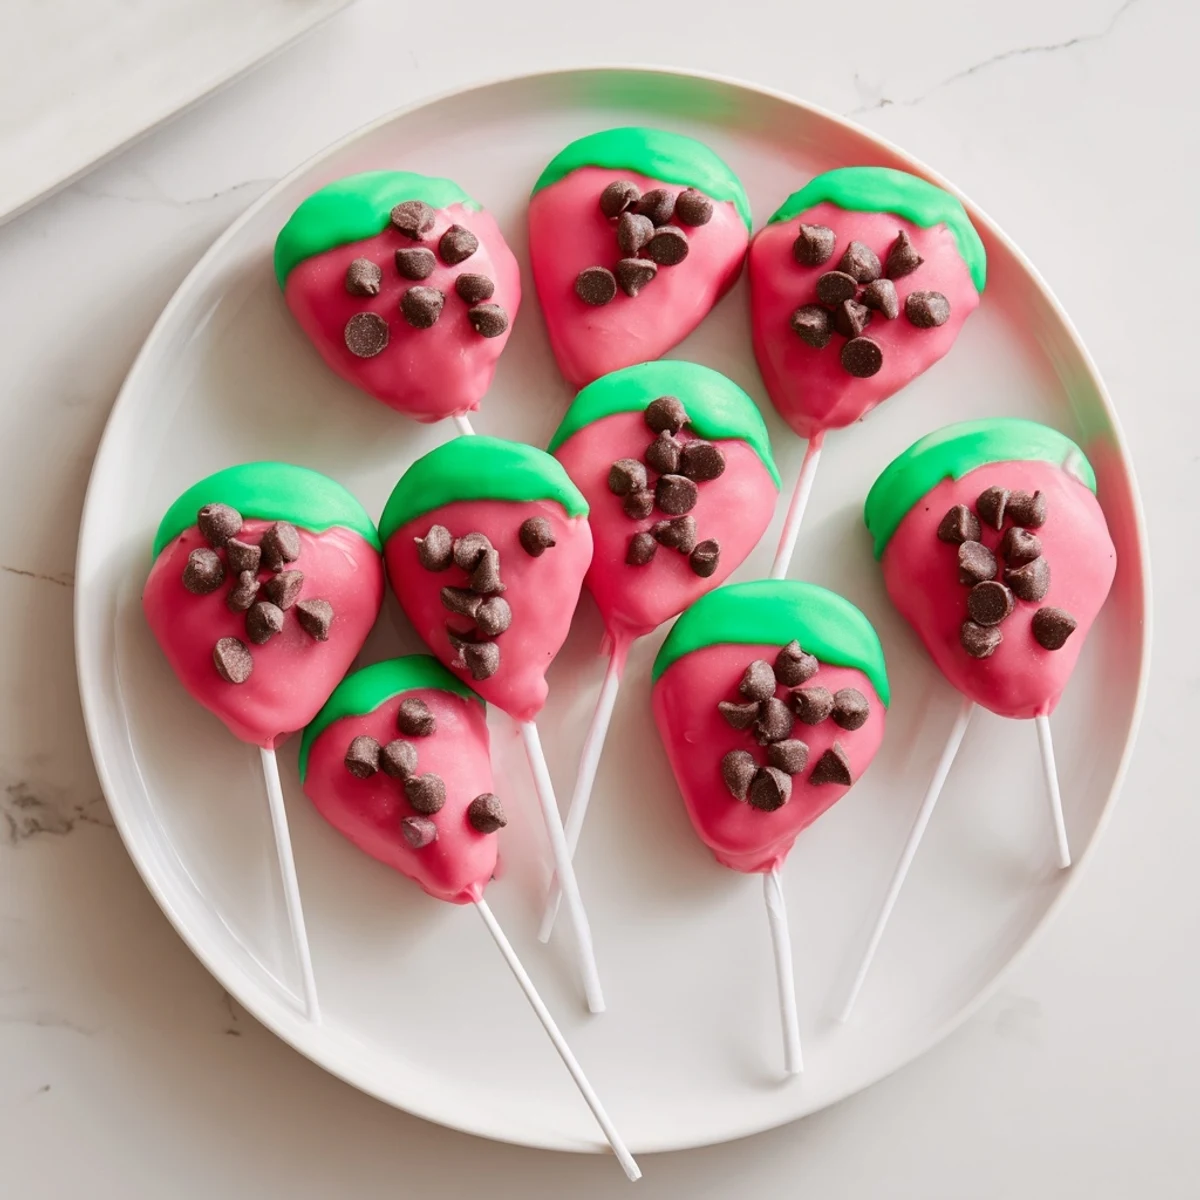
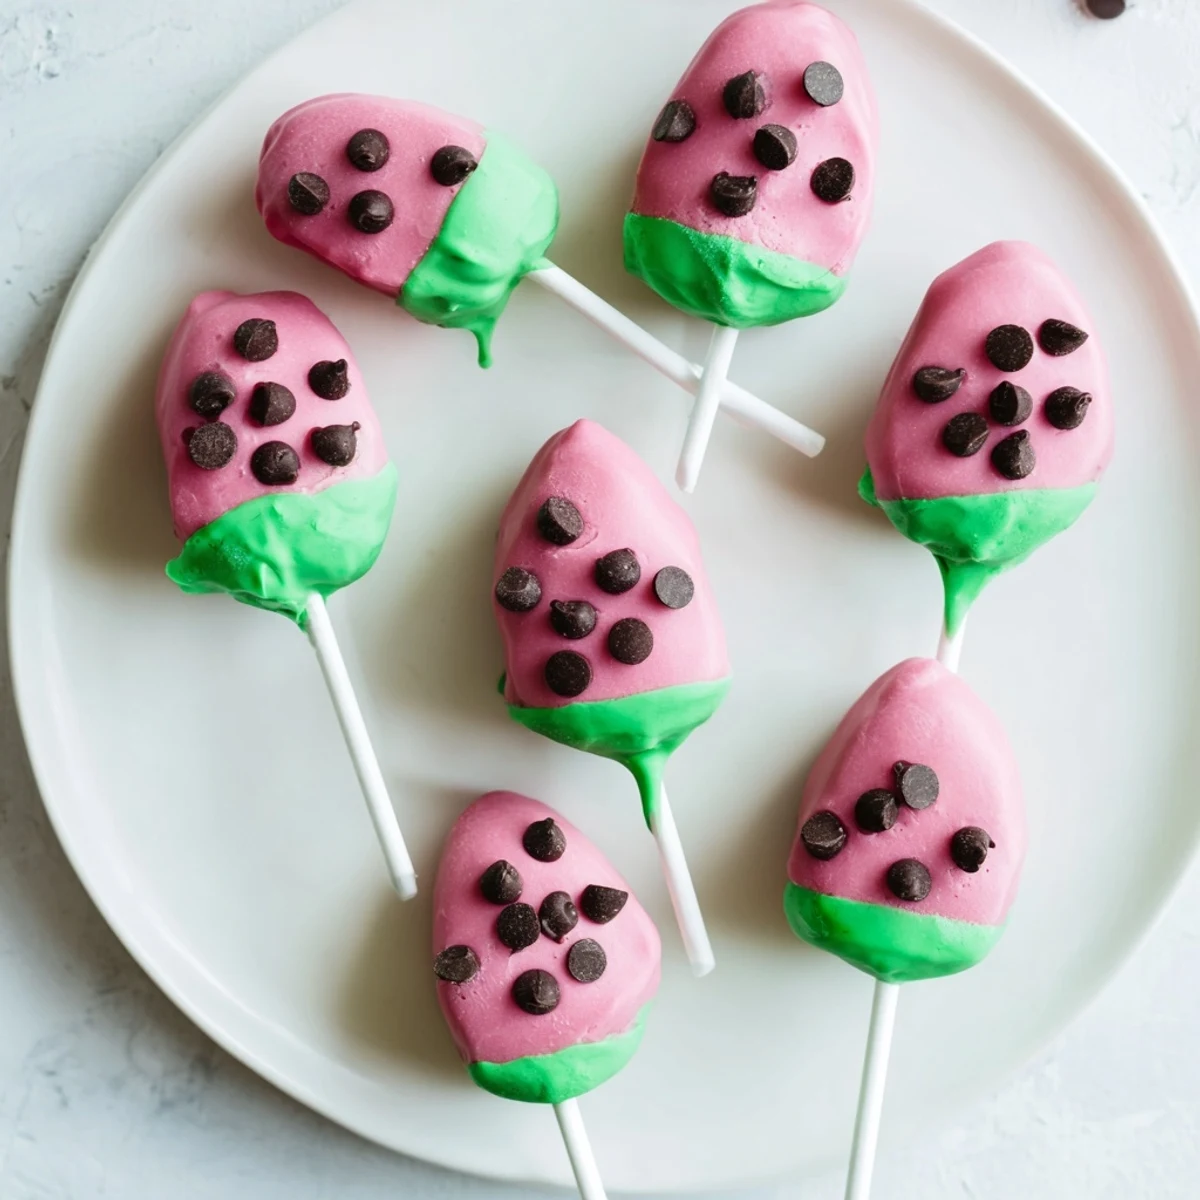
 Create adorable bite-sized treats that look just like watermelon slices. These vanilla cake pops combine moist cake with cream cheese frosting, shaped into teardrops and coated in pink and green candy melts. Perfect for summer gatherings, each pop features mini chocolate chip "seeds" for that authentic watermelon appearance.
The idea hit me when my niece pointed at a watermelon slice and asked why dessert couldn't look like fruit. I was hosting our annual July block party, and something about those bright summer colors sparked an entire afternoon of kitchen experimentation with cake balls and candy coating. By the time guests arrived, my kitchen counter looked like a miniature watermelon patch gone delightfully wrong.
Last summer, my daughter's best friend spotted these cooling on the counter and genuinely thought I'd figured out how to put cake inside watermelon. The look on her face when she bit into one was pure joy, and suddenly I was making them for every birthday, pool party, and Tuesday that needed cheering up. Now they're the most requested treat in our neighborhood.
Ingredients
- Vanilla cake mix or homemade vanilla cake: The neutral base lets the watermelon aesthetic shine without competing flavors
- Cream cheese: Room temperature is crucial here—cold cream cheese creates lumpy frosting that won't bind the cake properly
- Unsalted butter: Softened for 30 minutes makes all the difference in silky smooth frosting
- Powdered sugar: Sift it first if you're particular about texture, though I rarely bother
- Pure vanilla extract: Don't use imitation—real vanilla makes these taste special
- Pink or red candy melts: Wilton melts work reliably, but I've found Guittard gives the smoothest coating
- Green candy melts: These create that authentic watermelon rind look
- Lollipop sticks: Dip the tips in melted candy first or they'll pull right out
- Mini chocolate chips: These become your adorable watermelon seeds
- Vegetable oil: Sometimes candy melts need thinning—start with 1 teaspoon and add more as needed
Instructions
- Bake and completely cool your vanilla cake:
- Whether you use a box mix or your favorite recipe, let it cool completely—even overnight in the refrigerator makes crumbling easier and prevents mushy pops
- Whip up the cream cheese frosting:
- Beat everything on medium speed for 3 minutes until it's light enough that you could eat it with a spoon
- Create the cake pop mixture:
- Crumble the cake into fine crumbs, then add frosting one tablespoon at a time until it holds together when squeezed—you want playdough consistency, not mush
- Shape into watermelon forms:
- Roll into balls first, then gently pinch one side into a slight teardrop or rounded triangle shape—don't obsess over perfection here
- Insert and prep the sticks:
- Melt a tablespoon of green candy melts, dip each stick tip about ½ inch, push into the cake ball, then freeze for 20 minutes so everything sets firm
- Add the pink coating and seeds:
- Dip each pop in pink melts, let excess drip for 10 seconds, immediately press 5-6 chocolate chips into the wet candy in a seed pattern, then stand upright to set
- Create the green rind:
- Hold each pop sideways and dip just the bottom ⅓ into green melts, letting it drip for a moment before standing back up to set completely
 Pin This
 My neighbor's three-year-old took one bite and announced it was 'magic watermelon'—he couldn't understand why the inside tasted like birthday cake. His mom texted me the next morning asking for the recipe, and now we have a standing arrangement to make these together for every summer gathering. They've become something bigger than just cake pops.
Getting That Perfect Watermelon Shape
After making hundreds of these, I've learned that slightly imperfect shapes actually look more authentic than perfect spheres. Real watermelon slices have organic curves, so don't stress about geometric precision. The key is working with room temperature cake mixture—cold cake cracks when you try to shape it.
Candy Coating Secrets
The difference between professional-looking cake pops and homemade ones usually comes down to candy coating temperature. Too thick and you get clunky, uneven coating. Too thin and it drips right off. I heat mine in 30-second bursts, stirring between each, until it flows like warm honey.
Serving And Storage
These stay fresh at room temperature for 2 days, though they rarely last that long in my house. For parties, I arrange them in a watermelon slice as a centerpiece—it took me three gatherings to realize people were hesitating to take the first one because it looked too pretty to eat.
- Wrap individually in clear bags tied with green ribbon for party favors
- Store them standing upright in a glass jar with a tight lid for gifting
- Freeze undecorated cake balls for up to a month and dip fresh when needed
 Pin This
 Every time I make these now, I think about that afternoon in my kitchen with my niece, how a simple observation turned into our family's most requested summer treat.
Questions & Answers
- → How long do these stay fresh?
-
Store in an airtight container at room temperature for up to 3 days, or refrigerate for up to a week. Bring to room temperature before serving for best texture.
- → Can I make these ahead of time?
-
Yes! Prepare the shaped cake pops up to 2 days in advance. Keep them chilled in the freezer, then coat and decorate the day of your event for freshest appearance.
- → What if my candy coating is too thick?
-
Add 1 teaspoon of vegetable oil at a time to melted candy melts, stirring gently until you reach a smooth, dippable consistency. This helps achieve even coverage.
- → Can I use homemade cake instead of mix?
-
Absolutely! Use 400g of your favorite homemade vanilla cake. Ensure it's completely cooled before crumbling and mixing with frosting for the best texture.
- → How do I prevent the sticks from falling out?
-
Dip each stick tip in melted coating before inserting. Chill for 20 minutes to set. This creates a secure anchor that keeps the pops stable during dipping and serving.
