 Pin This
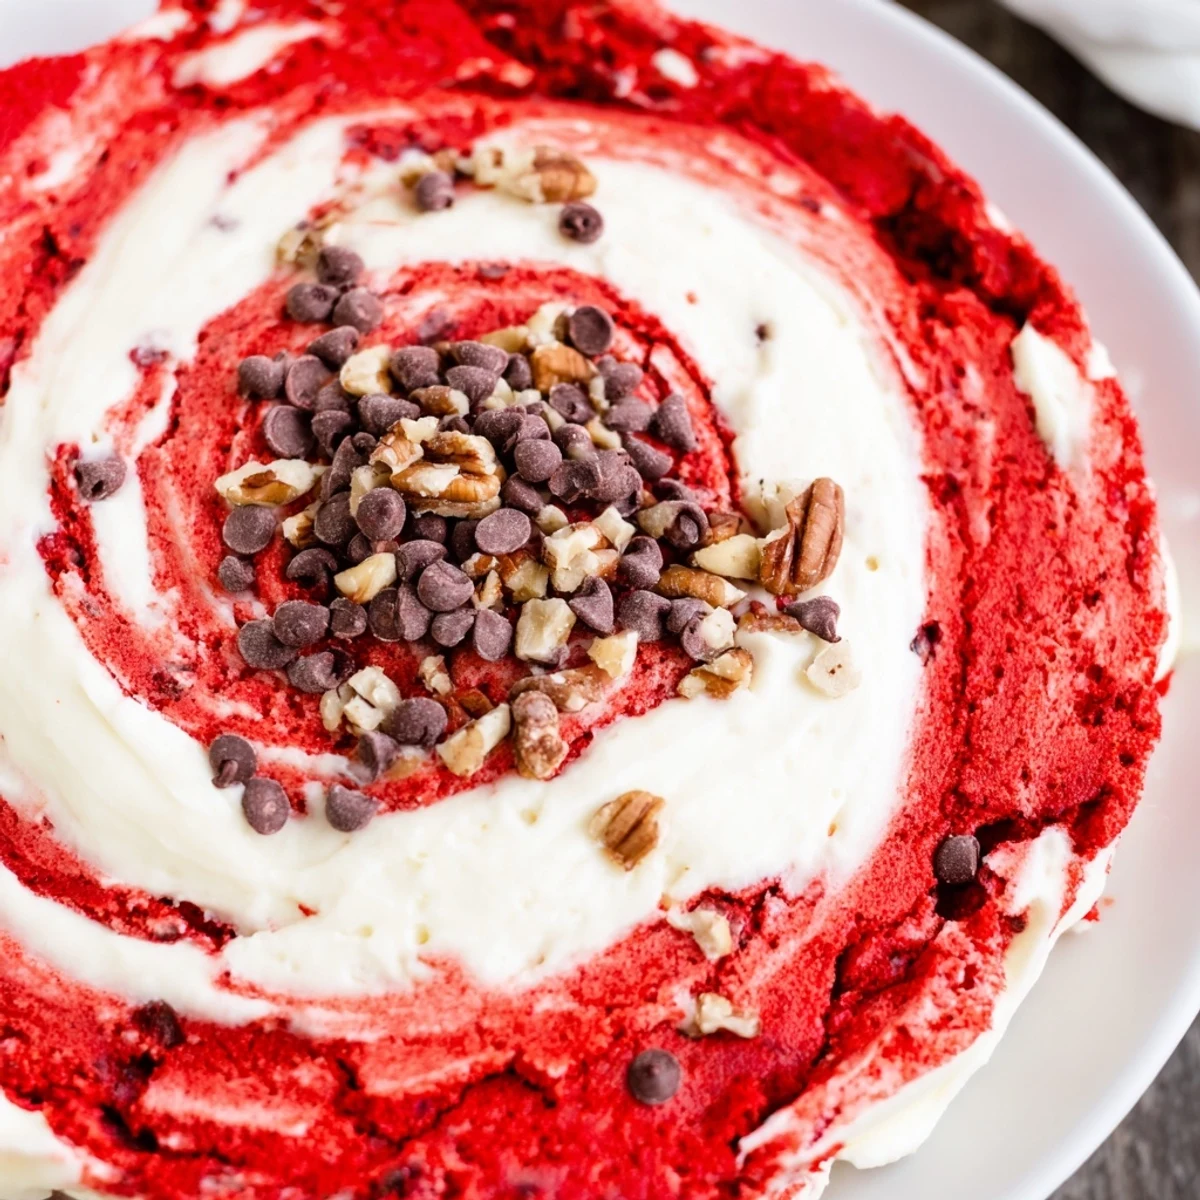
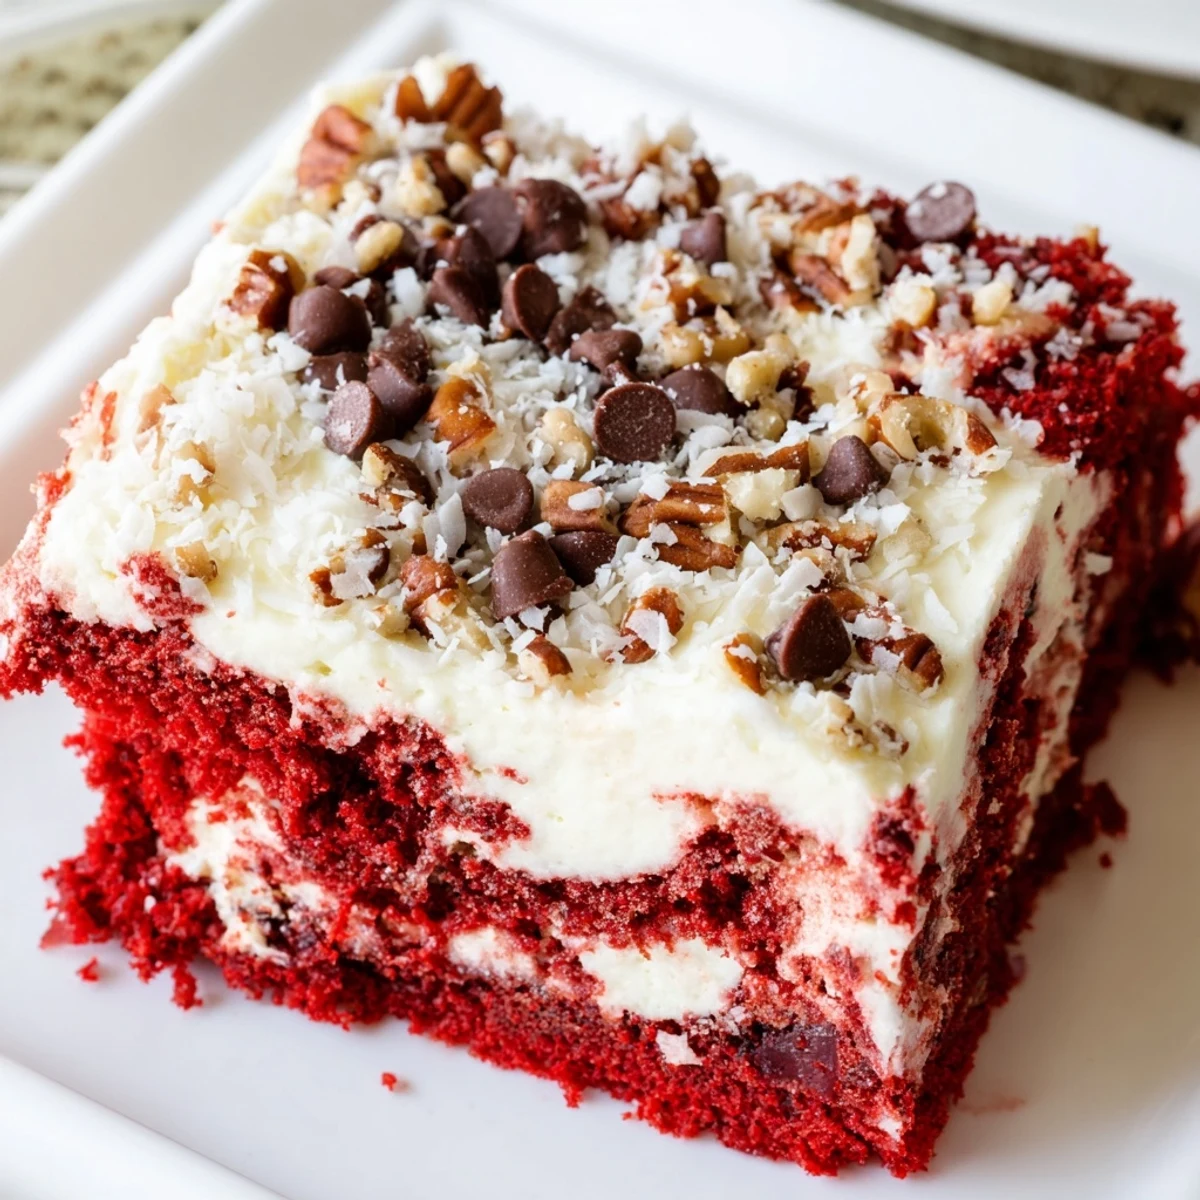
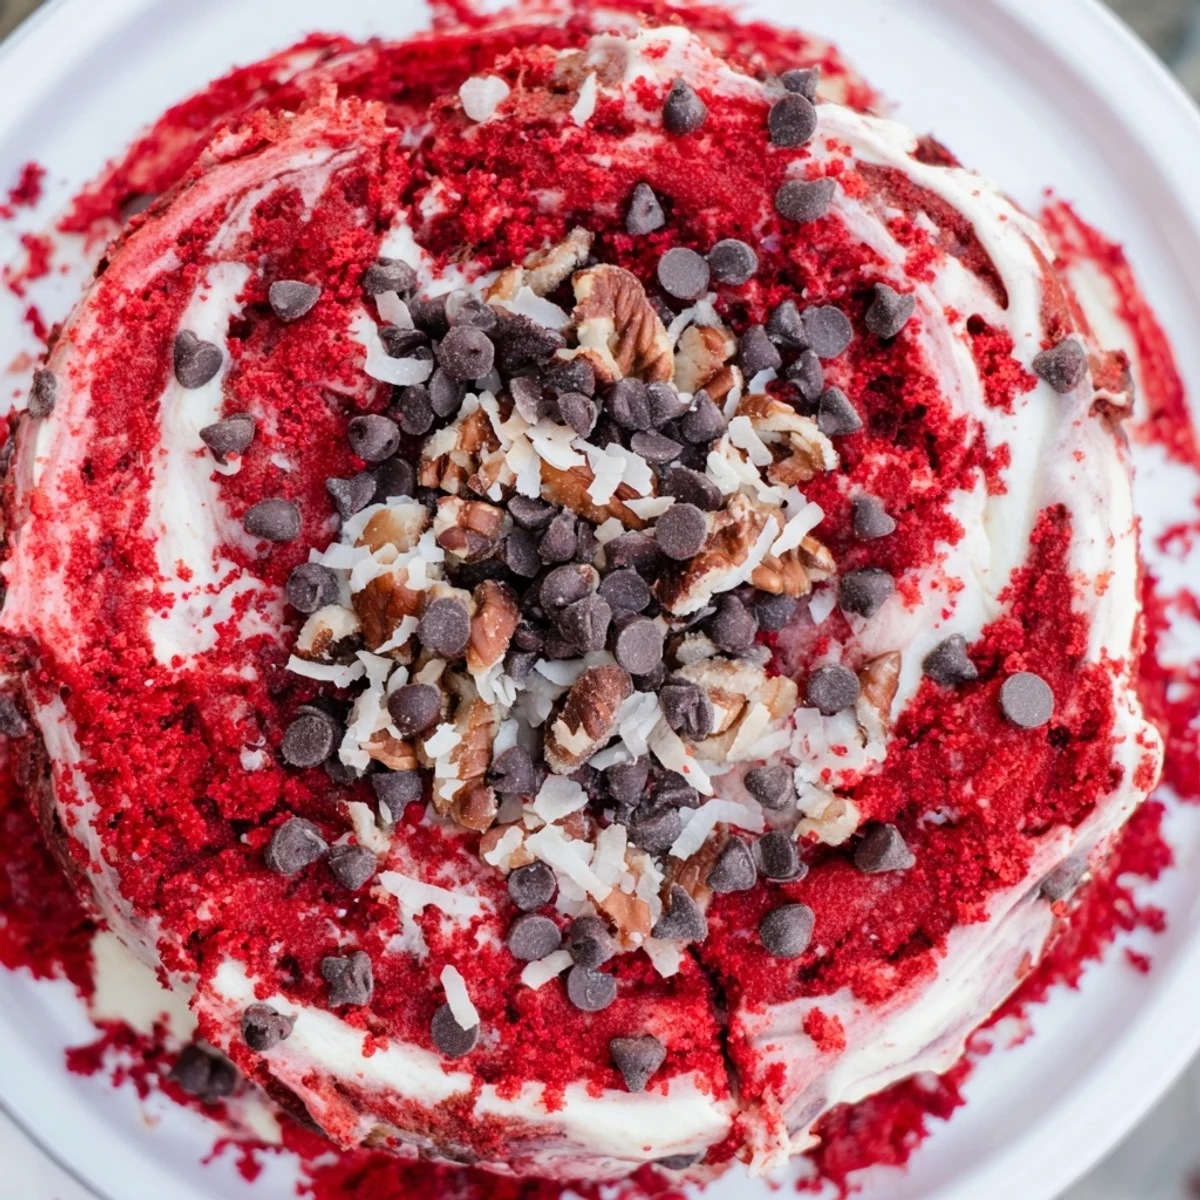
 This indulgent red velvet earthquake cake combines the classic flavors of red velvet with a rich cream cheese swirl that creates dramatic cracks and crevices during baking. The addition of semi-sweet chocolate chips and toasted pecans adds layers of texture and flavor throughout the dense, moist crumb.
Perfect for gatherings or special occasions, this dessert delivers restaurant-quality results with minimal effort. The cake emerges from the oven with a beautifully marbled appearance and irresistibly gooey pockets of cream cheese filling.
The first time I saw an earthquake cake, I honestly thought something had gone wrong in the oven. Those dramatic cracks and crevices looked like a baking disaster, but one taste convinced me it was actually delicious chaos in the best possible way. This red velvet version combines that signature cracked appearance with cream cheese swirls that sink and create little pockets of gooey goodness throughout.
I brought this to a potluck last winter and watched it disappear within fifteen minutes. My friend Sarah kept asking what I did to make the cream cheese swirl into those little puddles throughout the cake, as if I had some secret technique. The truth is, the oven does all the dramatic work for you, creating those gorgeous fault lines that make every slice unique.
Ingredients
- Red velvet cake mix: The foundation that saves time while still delivering that classic velvet texture and subtle cocoa flavor we all love
- Buttermilk: This is the secret ingredient that makes red velvet so tender and adds a subtle tang that balances the sweetness
- Cream cheese: Softened to room temperature is crucial here so it blends into a silky smooth mixture that will swirl beautifully
- Unsalted butter: Also softened, this creates that luscious cream cheese filling that sinks into the batter while baking
- Powdered sugar: Sweetens the cream cheese layer without adding graininess, and it helps stabilize the mixture
- Chocolate chips: Semi-sweet works best here because the chips create little melted chocolate pockets throughout the cake
- Pecans and coconut: These optional add-ins create texture variation and add those classic earthquake cake crunch spots on top
Instructions
- Preheat your oven and pan:
- Get your oven to 350°F and generously grease a 9x13 baking pan with butter or cooking spray, paying extra attention to the corners
- Whisk together the cake batter:
- In a large bowl, combine the cake mix, eggs, oil, buttermilk and vanilla extract, mixing until everything is smooth and well incorporated
- Spread the batter evenly:
- Pour the red velvet mixture into your prepared pan and use a spatula to spread it into an even layer
- Make the cream cheese swirl:
- In a separate bowl, beat the softened cream cheese and butter until creamy, then add powdered sugar and vanilla until fluffy and smooth
- Add the earthquake effect:
- Drop spoonfuls of the cream cheese mixture all over the cake batter, then use a knife to gently swirl through both layers
- Sprinkle your toppings:
- Scatter the chocolate chips evenly over the top, followed by pecans and coconut if you are using them
- Bake until mostly set:
- Bake for 38 to 42 minutes until the center is mostly set but still slightly gooey, and do not worry if it looks a bit jiggly
- Let it cool completely:
- Cool in the pan for at least 30 minutes before slicing to let those cream cheese pockets set up slightly
 Pin This
 My sister texted me at midnight the first time she made this, saying she thought she had ruined it because of how cracked the top looked. I just laughed and told her to wait until morning when those cracks would have filled with gooey cream cheese and she would understand the magic. She sent another photo the next day of an empty pan with just a few crumbs remaining.
Making It Your Own
Feel free to experiment with different mix ins like white chocolate chips or chopped walnuts for a totally different flavor profile. You could also add a splash of espresso to the cake batter for a mocha red velvet twist that pairs beautifully with the cream cheese.
Serving Suggestions
This cake is incredible served slightly warm, when those chocolate chips are still melty and the cream cheese pockets are at their gooey peak. A dollop of whipped cream or a scoop of vanilla ice cream on top never hurt anyone either.
Storage and Make Ahead Tips
The cake actually tastes even better the next day once the flavors have had time to meld together and the cream cheese has settled into the crumb. Store it covered at room temperature for up to three days, or refrigerate if you prefer a firmer texture.
- You can freeze individual slices wrapped tightly for up to three months
- Let refrigerated cake come to room temperature for 20 minutes before serving for the best texture
- The cream cheese swirl makes this too rich to need frosting, which saves you an extra step
 Pin This
 There is something so satisfying about a dessert that embraces its imperfections and turns them into the star of the show. This earthquake cake proves that sometimes the most beautiful things come from a little delicious chaos.
Questions & Answers
- → What makes earthquake cake crack?
-
The cream cheese mixture sinks into the batter while baking, creating signature cracks and crevices that give this dessert its earthquake-inspired name and unique appearance.
- → Can I make this cake ahead of time?
-
Yes! This cake actually tastes better when made a day ahead. The flavors develop and the texture becomes even more gooey and delicious after chilling overnight.
- → How do I know when it's done baking?
-
The center should be mostly set with a few slight jiggly spots remaining. Avoid overbaking as the gooey texture is part of this cake's charm and appeal.
- → Can I use homemade red velvet cake batter?
-
Absolutely! While cake mix creates consistent results, your favorite homemade red velvet batter works beautifully with the cream cheese swirl and toppings.
- → What's the best way to store leftovers?
-
Keep covered at room temperature for up to 3 days, or refrigerate for up to a week. This cake actually becomes more fudgy and dense when chilled.
