 Pin This
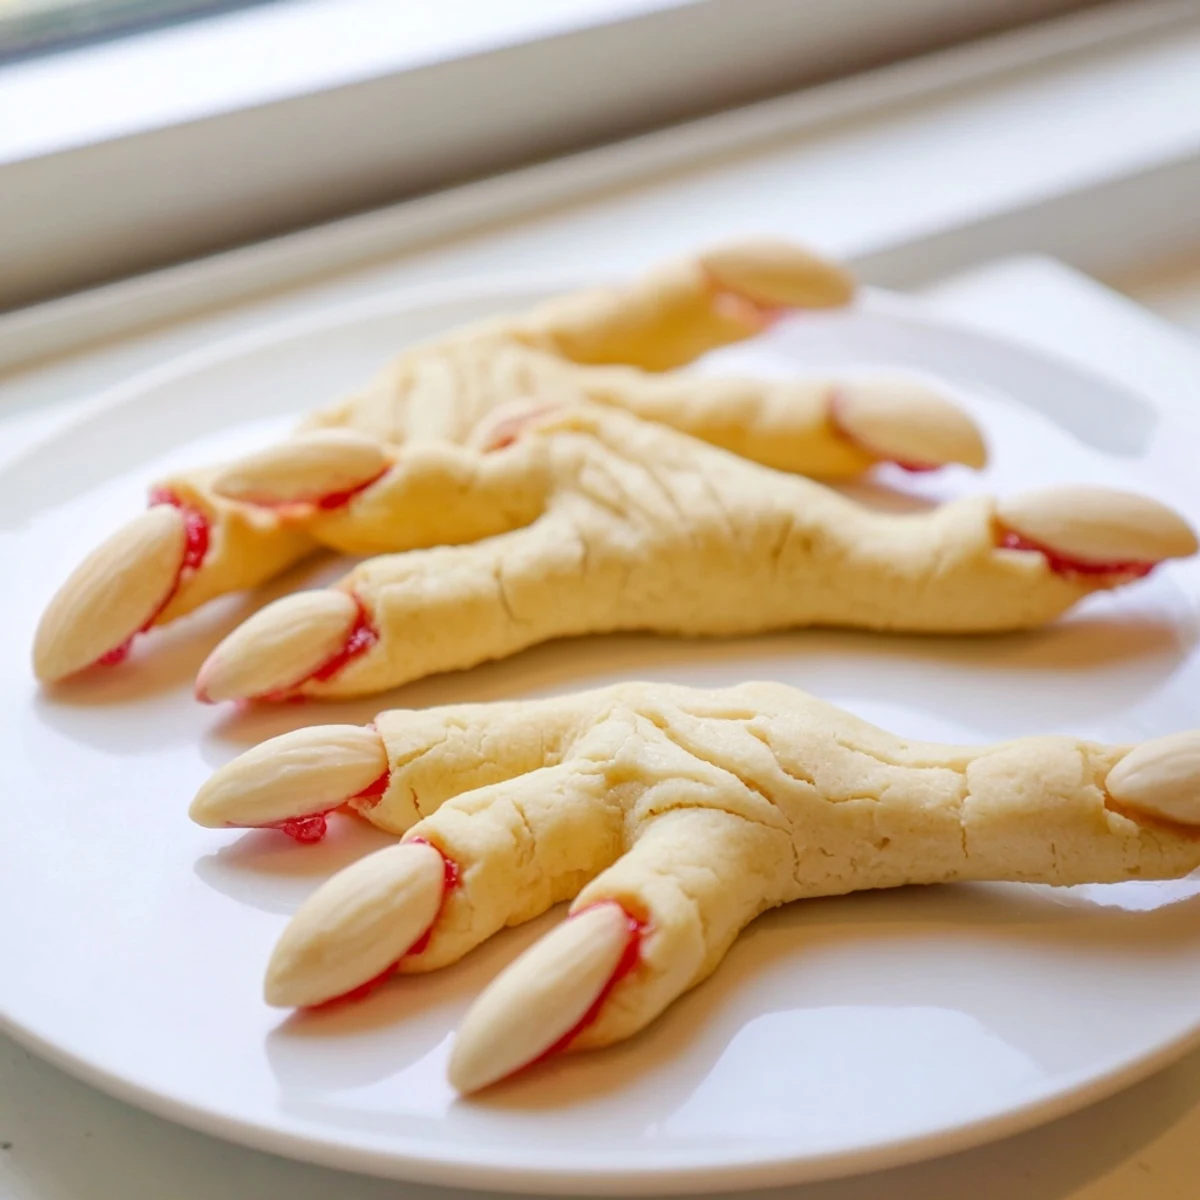
 These creepy witch finger cookies combine buttery almond-flavored dough with chillingly realistic details. Shape each piece into 3-4 inch fingers, use a knife to create knuckle lines, and press blanched almonds at the tips for fingernails. After baking, add a bloody effect with red gel or jam beneath each nail. The dough comes together quickly and bakes in just 20 minutes for a frightfully delicious Halloween treat that's both fun to make and impressively spooky to serve.
The first time I made these witch finger cookies for my daughter's classroom Halloween party, I wrapped each cookie individually in gauze bandages. The kids went absolutely wild, and even the teacher had to admit she was genuinely unsettled when she reached into the bowl and grabbed what felt like a mummified finger.
Last October, my neighbor stopped by while I was in the middle of rolling out finger after finger. She stood in my doorway watching me press almonds into dough and create knuckle creases with a butter knife, and I had to laugh when she said she'd never felt simultaneously disturbed and hungry.
Ingredients
- Unsalted butter: Room temperature butter creates the perfect texture for shaping without cracking
- Granulated sugar: Cream this thoroughly with the butter for that light, tender crumb
- Large egg: Bring this to room temperature too so it incorporates smoothly
- Vanilla and almond extract: The almond extract is essential for that nostalgic cookie flavor everyone recognizes
- All-purpose flour: Measure by weight if possible for consistent results every time
- Baking powder and salt: These give the cookies just enough lift without spreading too much
- Blanched almonds: Choose uniform ones for the most realistic looking fingernails
- Red gel food coloring or jam: Jam creates a more realistic, slightly tacky blood effect than pure gel
Instructions
- Prep your workspace:
- Preheat oven to 325°F and line baking sheets with parchment paper
- Cream the base:
- Beat softened butter and sugar until fluffy and noticeably lighter in color
- Add liquids:
- Mix in egg, vanilla, and almond extract until completely combined
- Combine dry ingredients:
- Whisk together flour, baking powder, and salt in a separate bowl
- Form the dough:
- Gradually incorporate dry ingredients until dough just comes together
- Shape the fingers:
- Roll tablespoon portions into 3 to 4 inch logs, slightly thicker at one end
- Add details:
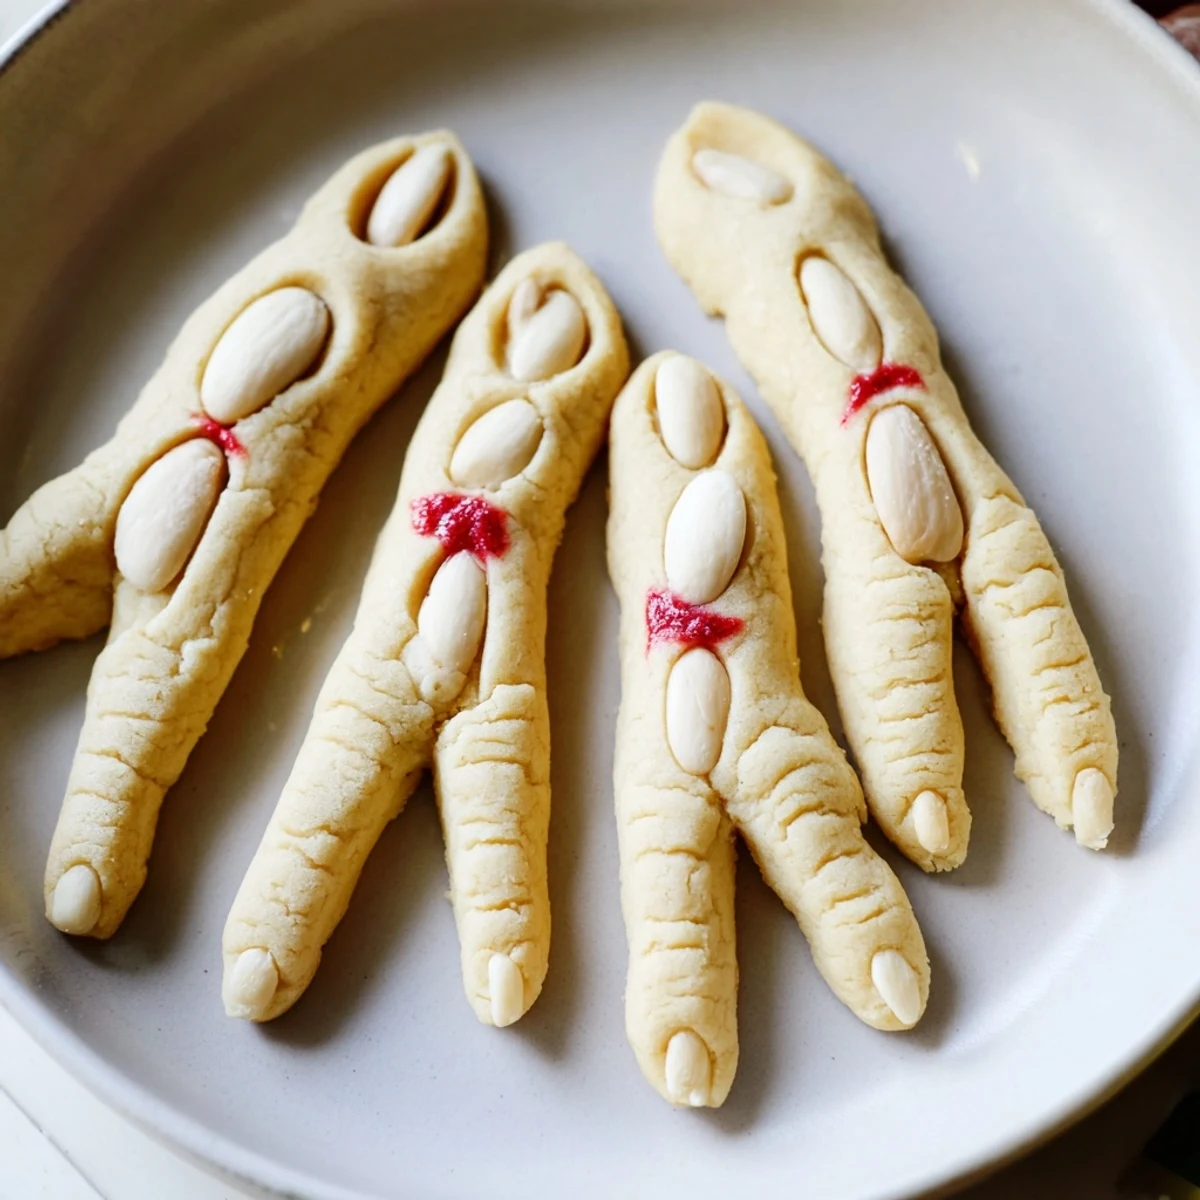
- Score knuckle lines with a knife and press an almond firmly into the tapered end
- Bake:
- Bake for 18 to 20 minutes until barely golden around the edges
- Create the bloody effect:
- Remove almonds, dab red coloring or jam into the indentation, and replace almonds
 Pin This
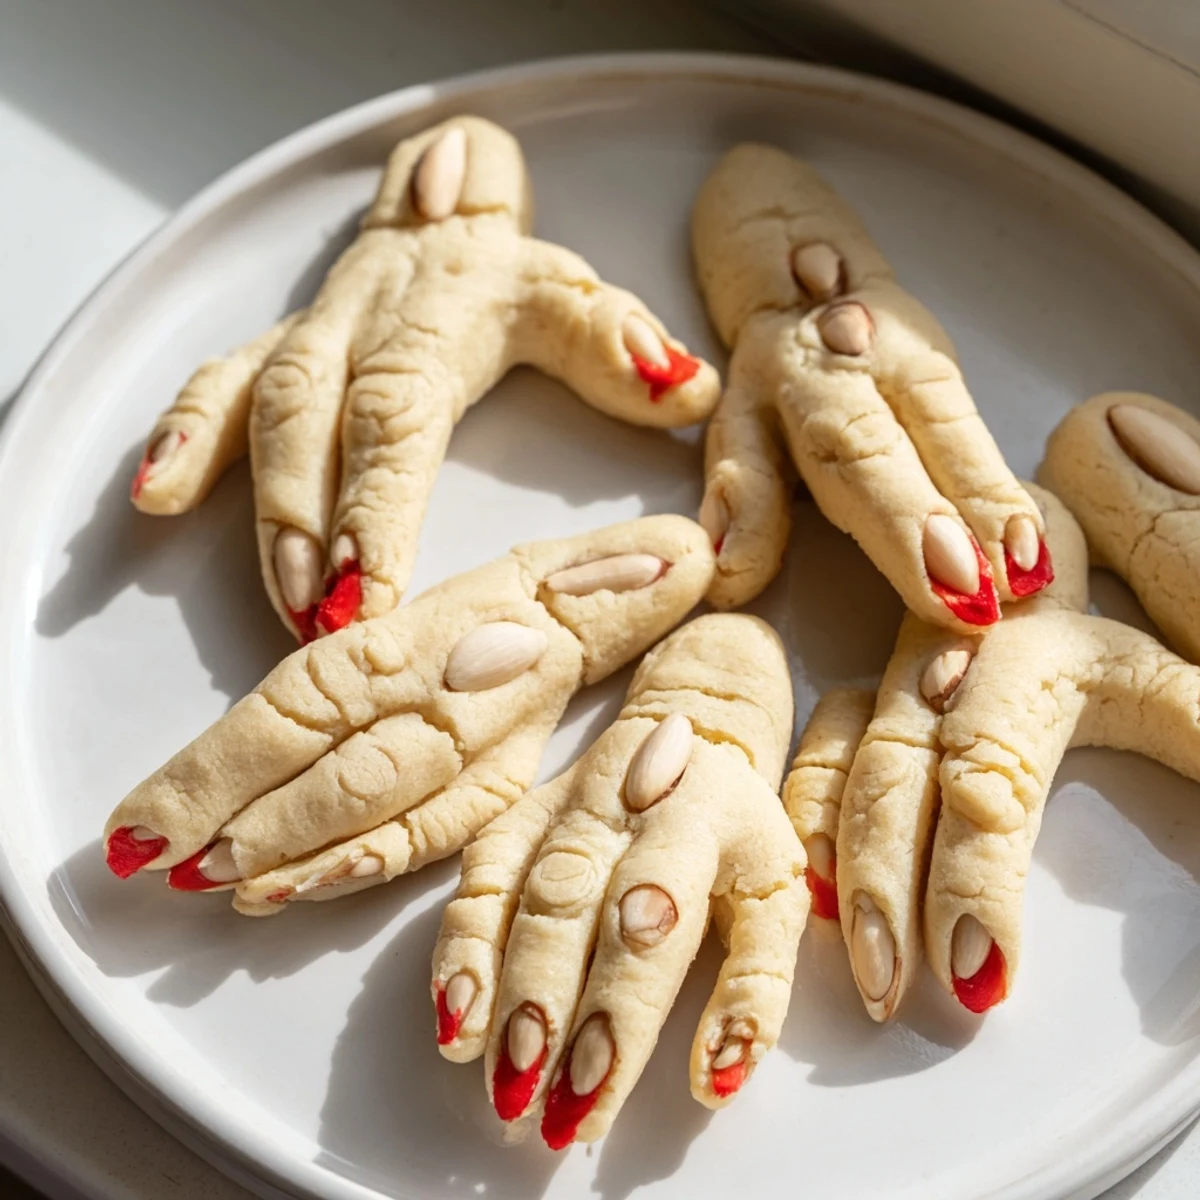
 My sister accidentally used whole unblanched almonds one year, and the brown skins gave the fingernails such a grossly realistic appearance that several guests actually refused to eat them. Sometimes the mistakes become the best improvements.
Making Them Extra Creepy
Ive learned that varying the finger lengths and curving some slightly makes the final display much more unsettling. Perfectly straight uniform cookies look too intentional, while slightly irregular ones feel alarmingly real.
Serving Suggestions
These cookies deserve a dramatic presentation. I like arranging them bursting out of a wooden bowl like grasping hands, or scattered across a dark platter with dramatic lighting at the party.
Flavor Variations
The basic dough is incredibly forgiving and takes flavor changes beautifully. One year I made a batch tinted pale green with food coloring for witchy fingers from the swamp.
- Add a pinch of cinnamon to the dough for warmer, spiced fingers
- Replace almond extract with lemon or orange for a brighter flavor profile
- Dip just the fingertips in melted dark chocolate for an elegant gothic variation
 Pin This
 These witch finger cookies have become the one Halloween tradition I genuinely look forward to all year. Theres something deeply satisfying about food that makes people shriek before they laugh.
Questions & Answers
- → How do I shape the cookies to look like fingers?
-
Roll about 1 tablespoon of dough between your palms into a 3-4 inch cylinder. Use a knife to gently score horizontal lines for knuckles, then press a blanched almond firmly into one end to create the fingernail. Make them slightly irregular for a more realistic creepy appearance.
- → What creates the bloody fingernail effect?
-
After baking, carefully remove the almond fingernails, dab a small amount of red gel food coloring or strawberry jam into the indentations, then press the almonds back in place. The red color seeps out slightly around the edges for a gory effect.
- → Can I make these cookies ahead of time?
-
Yes! The dough can be refrigerated for up to 3 days before baking, or frozen for up to 3 months. Already baked cookies store well in an airtight container at room temperature for about a week. Add the bloody details just before serving for the freshest appearance.
- → What if I don't like almond extract?
-
Replace the almond extract with an equal amount of lemon extract for a bright citrus flavor, or simply increase the vanilla extract to 2 teaspoons and omit the almond entirely. The cookies will still bake and shape beautifully without the almond flavor.
- → Can I color the dough for an even creepier look?
-
Absolutely! Divide the dough and tint portions with green or pale gray food coloring before shaping. Green dough creates a classic witchy appearance while gray gives a more corpse-like effect. Use gel colors for the most vibrant results without adding too much liquid.
- → What tools do I need to make these?
-
You'll need basic baking equipment: mixing bowls, an electric mixer for creaming the butter and sugar, measuring cups and spoons, baking sheets lined with parchment paper, a knife for creating knuckle details, and a wire rack for cooling. No special molds or equipment required!
